
Digital Image Processing
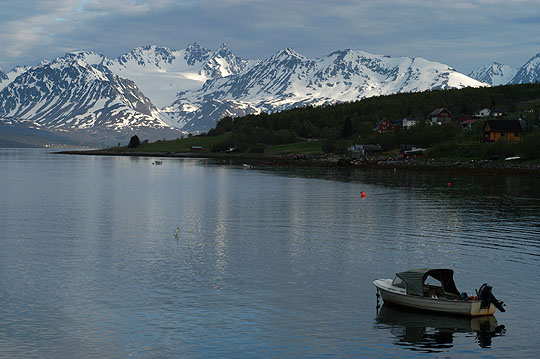
This is the original shot taken at Olderdalen, Norway at around 6:00 in the morning with the Nikon D100 digital SLR camera and the Nikon 20mm f/2.8 D lens, under automatic exposure. In order to post these and all other photos onto this web site, the size and resolution of the original JPEGs have been greatly reduced. The shot above, for example, was 6.2 Mb at 10"x6.7" and 300 dpi; on the screen above it is now 0.568 Mb (568Kb) at 7.5" x 5" and 72 dpi.
The camera grabbed the snow-streaked Lyngen mountains in the background, but the boat and the mid-ground were left underexposed as a result.
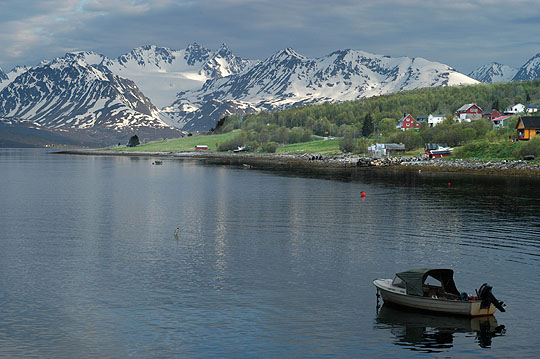
Using Adobe Photoshop, I copied and pasted over parts of the image to create three layers: the mountains in the background, the peninsula in the mid-ground and everything else in the foreground. The RGB (red, green, and blue) curve of the mid-ground can now be severely adjusted so that the village and the greenery -- as my eyes did see them -- will emerge. The edges of this layer are then "airbrushed" to blend in with the other layers.
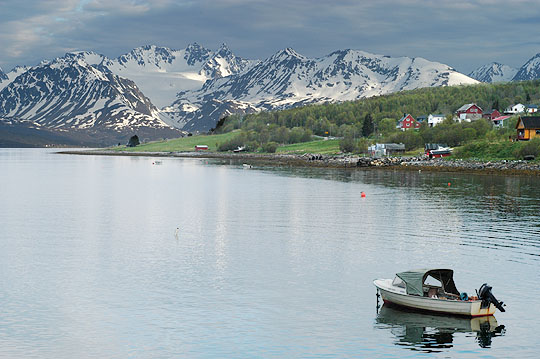
The foreground is now brightened to bring out the boat, and to equalize the reflection of the mid-ground in the water.
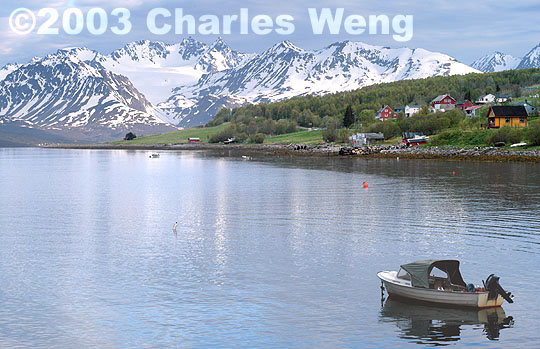
Ambient lighting for every layer is now tweaked to harmonize the entire image. The layers are then checked for perfect overlapping before the whole image is "flattened" to become a JPEG file once again.
Now let's see how we can apply similar techniques to portraits. Take this picture of my cousin Wendy:
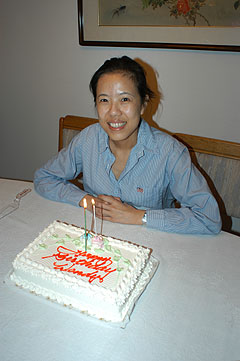
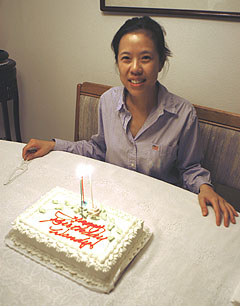
It's but a normal snapshot with no pretension to studio quality. Nevertheless, I objected to the flat features and the harsh back shadow typically produced by my camera's pop-up flash. I tried one more shot with the flash turned off:

The candle flames and the ambient incandescent lighting turned this image into a muddy wash of reds and yellows. By manually de-saturating the yellow and red tones (taking care not to add "blemishes" to her skin), pulling up the overall brightness, and cropping the empty table at the bottom, I got this:
Okay, now I've really bleached her light-blue striped shirt and the upholstery. Ignoring what I did to the furniture, I set out to fix her shirt on the basis of the original photo with flash. By copying the shirt as a separate layer in the image, I restored the yellow and red in the fabric, while adding generous amounts of cyan and blue. I even cleaned up her face a little. See for yourself if the result was worth the trouble.

| Back to top |